Connecting to an Autonomous Oracle Database from a Windows Desktop using SQLcl
How to install SQLcl on Windows and connect to an Oracle Autonomous Database step by step


In this article, we'll discuss how to use SQLcl, a modern command-line interface for Oracle databases, to connect to an Autonomous Oracle Database running in Oracle Cloud from a Windows desktop. We'll cover the prerequisites, installation, and configuration of SQLcl, as well as provide a step-by-step guide for connecting to your cloud-based Autonomous Oracle Database.
Prerequisites:
Before we begin, ensure that you have the following:
- An Oracle Cloud account with an active Autonomous Oracle Database instance.
- The necessary credentials and connection information for your Autonomous Oracle Database instance, including the wallet file.
- Java Development Kit (JDK) 8 or higher installed on your Windows machine.
Step 1: Download SQLcl
To download SQLcl, visit:

Select the appropriate Windows version of SQLcl and download the ZIP file.
Step 2: Extract and Configure SQLcl
- Extract the downloaded ZIP file to a convenient location on your Windows machine, such as C:\sqlcl.
Add the SQLcl 'bin' directory to your system's PATH environment variable. To do this:
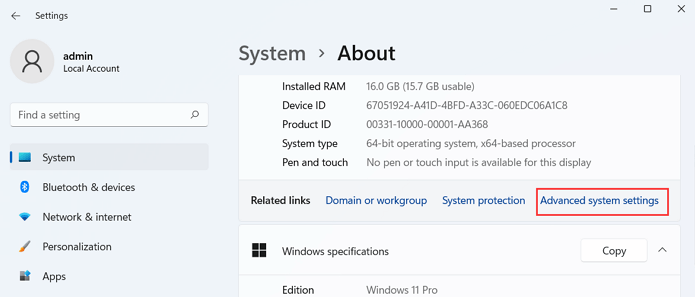
a. Go to Settings, then select "System" and the go to the "about" section.
b. Click 'Advanced system settings'.
c. In the 'System Properties' window, click the 'Environment Variables' button.
d. In the 'System variables' section, scroll down and select the 'Path' variable.
e. Click 'Edit', and then 'New'.
f. Add the path to the 'bin' directory of your SQLcl installation, such as C:\sqlcl\bin.
g. Click 'OK' to save your changes.
Step 3: Download the Wallet File
To connect to your Autonomous Oracle Database, you'll need a wallet file containing the necessary security certificates and connection information.
- Log in to your Oracle Cloud account and navigate to the Autonomous Database instance you want to connect to.
- Click on 'DB Connection' and then on the 'Download Wallet' button.
- Enter a password for the wallet file, and download the ZIP file to your local machine.
- Extract the contents of the wallet file to a secure location, such as C:\wallet.
Step 4: Configure the TNS_ADMIN Environment Variable
Set the TNS_ADMIN environment variable to the directory where you extracted the wallet files. To do this:
a. Follow the steps in Step 2 to open the 'Environment Variables' window.
b. Click 'New' under 'System variables'.
c. Enter 'TNS_ADMIN' as the variable name and the path to the wallet directory, such as C:\wallet, as the variable value.
d. Click 'OK' to save your changes.
Step 5: Connect to the Autonomous Oracle Database using SQLcl
Open a command prompt and enter the following command, replacing 'username', 'password', and 'service_name' with your Autonomous Oracle Database credentials:
sql username/password@service_nameFor example:
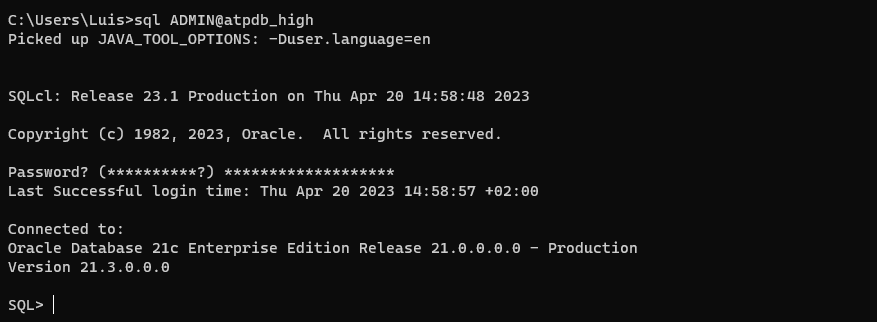
sql admin/password@atpdb_highYou can see the service_names you have configured, at the "DB Connection" page, when you're downloading the wallet:
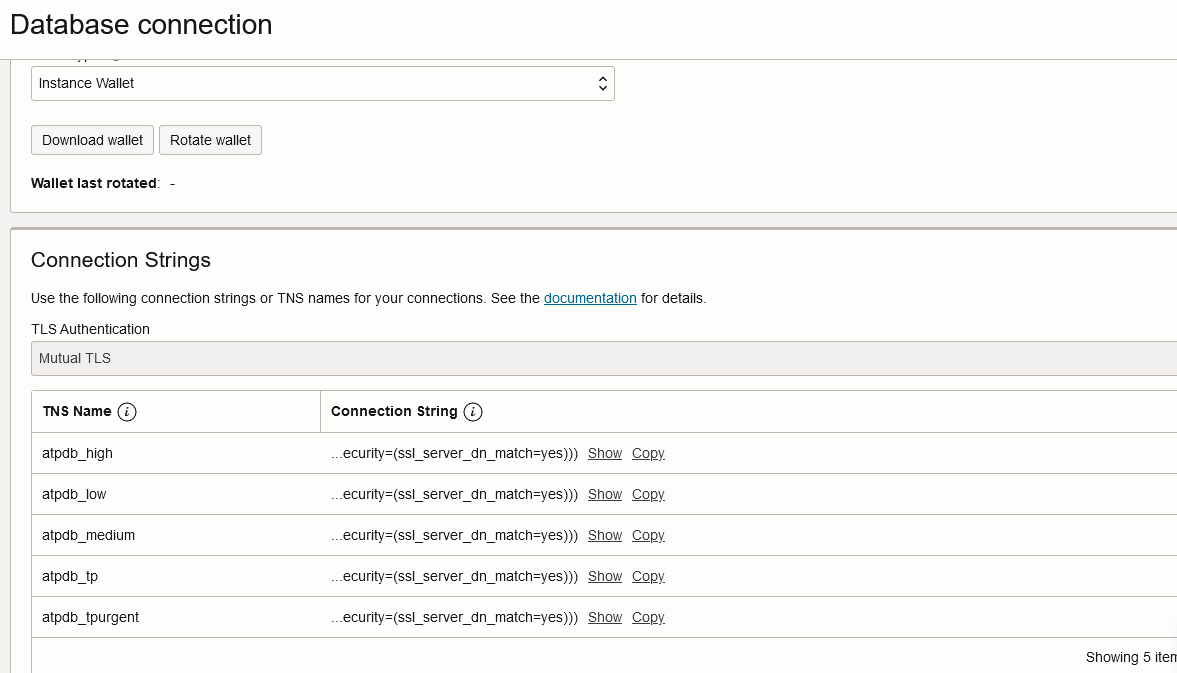
If everything is configured correctly, you should now be connected to your Autonomous Oracle Database using SQLcl. You can execute SQL queries, PL/SQL code, and manage database objects as needed.
This is what you should be seeing: